If your project files are stored in a remote repository on GitLab, you can connect that repository, so you can access and publish those files in Redocly.
To connect a GitLab repository, you must first create a new access token in GitLab. Afterward, you must create a new branch, enter the connection details, and merge the open pull request in Reunite.
Before entering the connection details in Reunite, you need to create and copy a new access token for your account in GitLab. Redocly uses this access token to establish a connection to your repository. GitLab offers multiple types of access tokens. The access token you use needs to have api scope and at least Maintainer role.
See the GitLab documentation for creating the following access token types with the API scope option:
Before you make any changes to your project, create a new branch. This new branch is a place where you can make changes without affecting the published site until you are ready. After you have iterated on your changes based on reviews by your team and the updates have been approved, you can merge your changes into the published site.
To create a new branch:
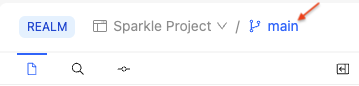
From the Reunite editor, click the name of the current branch at the top of the page.
Enter the name for your new branch, for example
new-dev-branch, and select Create branch.Reunite automatically replaces spaces with hyphens
-because spaces are not allowed in branch names.
After you have created a new branch in Reunite, you can add remote content to your project in Reunite using the connection details you have collected from GitLab.
To enter the connection details in Reunite:
- In the file tree, select the folder (or click on the empty space to select the root directory) where you want to add the remote content.
- Select + > New remote folder > Add Git repository to add a remote content folder, or + > New remote file > Add Git repository to add a remote content file.
- Enter a name for the new remote content (folder or file) and press the Enter or Return key.
- From the list of Git providers, select GitLab or a self-managed GitLab instance.
- Enter a Credential name for the new GitLab credential.
- Enter the Access token you saved from the Create a new access token in GitLab step and select Next.
- Select the Namespace > Project > Branch.
- (Optional) Select the Folder or File, depending on whether you are adding a remote folder or a remote file.
- (Optional) Select the Auto-sync or Auto-merge toggles to turn off either option.
- Select Add remote. This action opens a pull request in Reunite automatically.
You can click the View Pull Request button next to your new branch name to view the pull request.
After you enter the connection details in Redocly, a pull request to merge your updates with the default branch opens. When you merge the pull request your changes are added to your main branch and a production deployment is triggered.
To merge the open pull request in Reunite:
- Select the View Pull Request button next to your branch name.
- Review your updates in the Review tab.
- After the tests have run and your pull request has been approved, click the Merge button to merge your updates with the default branch.
- Connect a Git provider - Connect entire GitLab repositories to your project for comprehensive version control and automated documentation workflows
- Use the Editor - Leverage Reunite's collaborative editing environment for creating content with GitLab remote content integration and team collaboration
- Manage projects - Access feedback, deployment details, and project settings for GitLab remote content-enabled documentation projects
- Configuration reference - Complete redocly.yaml configuration options for GitLab remote content integration and project customization