Redocly offers an online editor in Reunite where you can add, edit, or delete files and folders in your project. Since Redocly projects are saved using Git, any updates are saved by committing changes, and opening, reviewing, and merging pull requests.
Before you make any changes to your project, create a new branch. This new branch is a place where you can make changes without affecting the published site until you are ready. After you have iterated on your changes based on reviews by your team and the updates have been approved, you can merge your changes into the published site.
To create a new branch:
From the Reunite editor, click the name of the current branch at the top of the page.

Enter the name for your new branch, for example
new-dev-branch, and select Create branch.Reunite automatically replaces spaces with hyphens
-because spaces are not allowed in branch names.
If you need to change to a different branch from the branch you are working in, you can change the branch using the branch switcher at the top of the editor page.

To switch branches, click the branch switcher and select the branch. If you don't see the branch, use the search field to find it.
After you have created a new branch, you can add or delete files or folders in the editor.
- To add files or folders, click the + icon and select New file or New folder.
- You can also drag and drop files from your computer into the file tree pane.
- Create a directory structure for a file when creating the file by typing the folder name followed by a
/and then the file name.
- To delete files or folders, right-click the file or folder and select Delete.
- To copy files or folders, right-click the file or folder and select Copy.
- To rename files or folders, right-click the file or folder and select Rename.
The editor includes an editor pane where you can edit the content in your files. To edit content, select the file in the file tree pane and make your edits in the editor pane. Your updates display in the Webview live preview pane. You can also use the toolbar at the top of the editor pane to add the following Markdown syntax automatically:
- Headings
- Bold text
- Italics text
- Links
- Blockquote text
- Code blocks
- Ordered lists
- Unordered lists
- Checkbox lists
Another way you can add images and links is to drag the files from the file tree to the editor pane and drop them.
The toolbar also includes the following options to add Markdoc tag syntax automatically:
- If
- Else
- Table
- Partial
- Admonition
- Code snippet
See the Markdoc tag library for more information on both the built-in and custom Redocly tags.
You can add images to to Markdown files in the following ways:
- Drag an image file from the file tree and drop it into an open Markdown file.
- Drag an image file directly from your computer and drop it into an open Markdown file.
The image is automatically saved to the closestimagesfolder if one exists. If there isn't animagesfolder in the same location as the Markdown file, one is created. - Manually type the image link in the file.
Once you are finished making your updates, you must commit them to your branch.
To commit your updates:
Click the Commit button, or the commit icon.

Review the diff by clicking on the modified file.
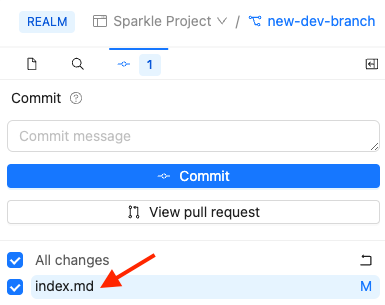
When you are finished reviewing the diff, you can close the tab on the (changes) file.
(Optional) you can deselect the files you want to exclude from the commit.
Enter a commit message describing your updates. For example, "Update index.md"
Click Commit.
After you have made the first commit to a branch, you can open a draft pull request.
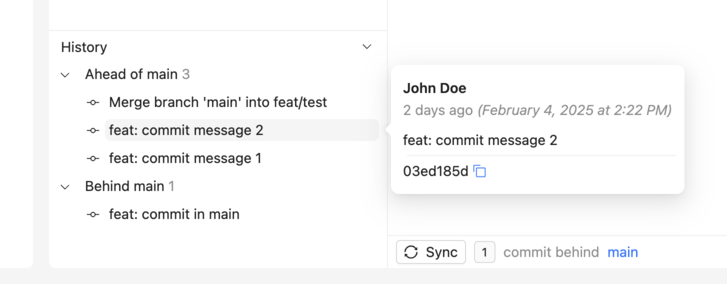
The commit history panel displays all changes made to your branch and helps you stay in sync with the production branch.
- In the editor, click the Commit tab and then click History at the bottom of the Commit panel. The panel displays two sections:
- Ahead of main: Displays new commits on your current preview branch. You can also create a new pull request or view the pull request for your branch.
- Behind main: Displays commits from the production branch that aren't in your current preview branch. You can also sync your preview branch with the production branch by clicking the Sync with main button.
Commit history is only available for preview branches.
Hover over any commit to see details including:
- Author
- When the commit was made
- Commit message
- Commit hash
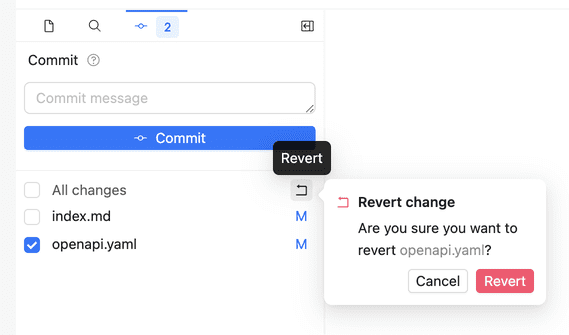
If you want to discard the changes you made, before you commit them to the branch, you can revert the changes to put the files back into the state from the last commit. You can revert changes to all files since the last commit, or select the files to revert.
To revert changes:
- Above the file tree, click the Commit icon to access the Commit tab.
- Select the checkboxes of files you want to revert, or select All changes.
- Click the Revert icon and confirm the action.
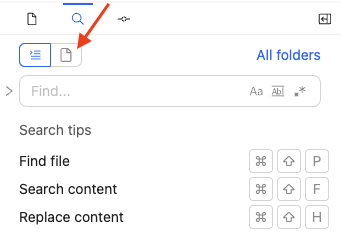
You can search in the editor to find content or files or to find and replace content within the files of your project. To set search to files instead of content inside of files, click the Find a file icon above the search input field.
By default, search does not include a replace option. You can add the replace option by selecting the replace toggle.
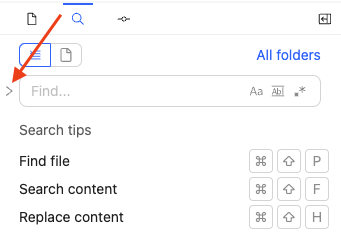
Selecting the replace toggle again removes the option.
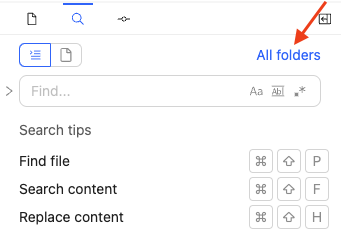
By default, searches include all folders, but you can specify a folder using the folder selector.
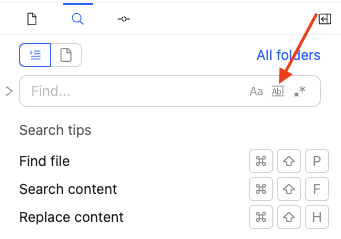
You can also specify whether search should match the case and whole word of your search query, and use regular expressions in your search query by clicking the icons in the search field.
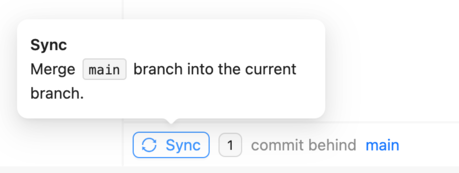
If you are working on a development branch, you may need to sync your branch with the main branch if changes have been added to main while you were working in the development branch.
You can sync your branch, pulling in the changes from main since you created your development branch, by clicking the Sync button at the bottom of the editor pane.
- Use previews - Access deployment previews to see how your changes will appear before publishing to production
- Use Webview - Adjust the live preview of your content updates while editing for real-time visual feedback
- Add remote files - Include and synchronize files from remote locations and external repositories in your project
- Markdoc tag library - Explore available Markdoc tags and components for enhanced content formatting and functionality
- Project structure - Learn best practices for organizing files and content structure in your documentation projects