Add a catalog
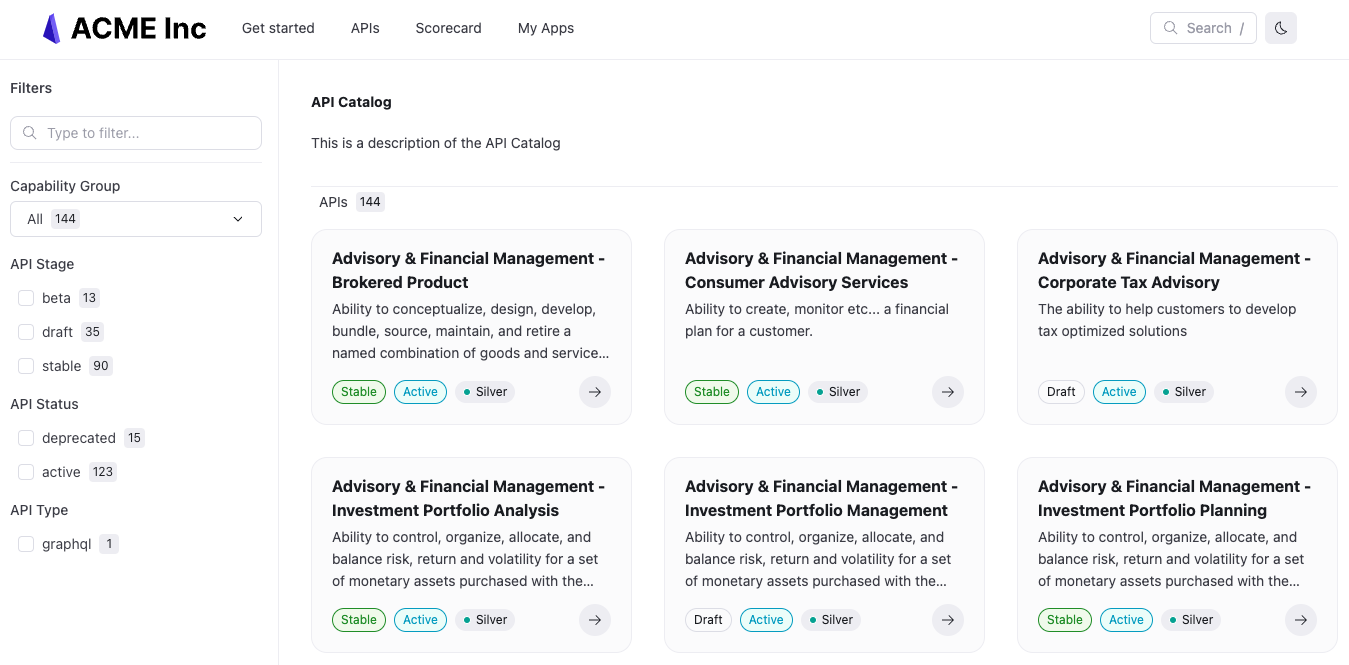
If you have many API definitions, a catalog is a more organized way to display your API definitions in your project.
Add a catalog to your project by completing the following steps:
- Organize files: Organize your API definitions into one or more folders
- Configure redocly.yaml: Add the
catalogandnavbarconfigurations to yourredocly.yamlfile
Before you begin
Make sure you have the following before you begin:
- finalized versions of your API definitions
- a
redocly.yamlfile in the root of your project
Organize files
To add a catalog to your project, first you must organize your API definition files into one or more folders.
You can include however many folders you need and name your folder or folders anything you like. See Names for advice on naming.
The following is a sample file structure:
my_catalog/
├──product-1/
│   ├──api-1.yaml
│   ├──api-2.json
│   └──api-3.yaml
├──product-2/
│   ├──api-a.yaml
│   └──api-b.json
├──redocly.yaml
└──sidebars.yaml
After organizing your API definition files into folders, configure your catalog.
Configure redocly.yaml
Once you have organized your API definition files into one or more folders, you must configure the catalog and navbar options in your redocly.yaml file.
Configure catalog
To configure the catalog object:
- Add a name for your catalog under the
catalogobject. It does not appear anywhere in your project.catalog: acme-catalog: - Add the following required options under your catalog name:
title: This title is the main heading on the catalog page.catalog: acme-catalog: title: Acme API catalogdescription: This description displays directly under the title on the catalog page.catalog: acme-catalog: title: Acme API catalog description: Discover how our APIs can support your business.slug: This is the path where you want the catalog to render. It can be anything as long as it matches thepageorhrefoption in thenavbarobject. Include a leading and trailing slash.catalog: acme-catalog: title: Acme API catalog description: Discover how our APIs can support your business. slug: /acme-apis/items: This object is a list of what files to include in the catalog. Add the following options:directory: This required option is the path to the directory with files that should be included in the catalog.flatten: (Optional) If set totrueall API definition files, even those in subdirectories are included in the catalog. If set tofalseonly top-level API definition files are included in the catalog as well as the first file from every subdirectory. By default, this option is set tofalse.includeByMetadata: (Optional) This is a map of metadata properties used to restrict what files are included in the catalog. See Categories for more information.catalog: acme-catalog: title: Acme API catalog description: Discover how our APIs can support your business. slug: /acme-apis/ items: - directory: ./catalog flatten: true includeByMetadata: type: [openapi]
- (Optional) Add the following options under your catalog name:
titleTranslationKey: This option is the key you would use to translate the title for the catalog page. See Localize labels using translation keys for more information.descriptionTranslationKey: This option is the key you would use to translate the description for the catalog page. See Localize labels using translation keys for more information.filters: This object includes a set of options for filtering your APIs. See Categories for more information.separateVersions: This option allows you to separate APIs with multiple versions into their own catalog items. This option defaults tofalse.groupByFirstFilter: This option allows you to group APIs by the first filter they belong to. See Categories for more information.
Configure navbar
For your catalog to appear in the navbar at the top of the page, you must include it in the navbar configuration in your redocly.yaml file.
To configure the navbar item to include your catalog:
- Add the
navbarobject.catalog: acme-catalog: title: Acme API catalog description: Discover how our APIs can support your business. slug: /acme-apis/ items: - directory: ./catalog navbar: - Add the
itemsobject under thenavbarobject.catalog: acme-catalog: title: Acme API catalog description: Discover how our APIs can support your business. slug: /acme-apis/ items: - directory: ./catalog navbar: items: - Add either the
pageorhrefoption with the value of your catalog'sslugoption. If you use thepageoption, and do not include thelabeloption, the text for the button on the navbar will match the catalog'stitleoption's value. If you use thehrefoption, and do not include thelabeloption, the text for the button on the navbar will match thehrefoption's value. Otherwise, you can specify the text by using thelabeloptional option.catalog: acme-catalog: title: Acme API catalog description: Discover how our APIs can support your business. slug: /acme-apis/ items: - directory: ./catalog navbar: items: - page: /acme-apis/ - (Optional) Add the following options:
label: This option is the text that appears on the button on the navbar for your catalog. If you do not include it, the value for thetitleoption of your catalog is used.labelTranslationKey: This option is used if you are translating the button text into a different language. See Localize labels using translation keys for more information.icon: This option is where you can put the path to an icon you want to appear next to your catalog's button text in the navbar.external: This option causes a new tab to open when the user clicks the item in the navbar. This option isfalseby default.linkedSidebars: This option allows you to add this item to pages on a specified sidebar or multiple sidebars. It is an array of relative paths to these sidebar files.
Example catalog and navbar configuration
The following catalog and navbar configuration includes a single catalog, with two filters, pulling definitions from the catalog folder in the root directory:
logo:
image: ./images/logo.svg
altText: My logo
link: https://example.com
favicon: ./images/logo.svg
catalog:
  acme-catalog:
title: Acme API catalog
description: 'Discover how our APIs can support your business.'
slug: /acme-apis/
items:
- directory: ./catalog
flatten: false
filters:
- title: Content type
property: tags
options: [Cats, Learning]
type: checkboxes
- title: API type
property: REST
missingCategoryName: SOAP
type: select
navbar:
items:
- page: /acme-apis/
icon: ./images/logo.png
external: true
linkedSidebars:
- ./catalog/sidebars.yaml
- label: Other docs
href: https://redoc.ly/docs/developer-portal/introduction/
external: trueResources
- Configure your scorecard so that each API is checked against appropriate standards.
- Use categories to filter APIs in the catalog.
- Learn more about API Governance.