Upgrade product version
If you are working in Reunite, your project updates automatically when new versions are released and you trigger a new build. If you are working locally, you must update your package.json file to the version you want your project to use.
Before you begin
Make sure you have the following before you begin:
- If working in Reunite, you need at least the Member role for the Organization your project has been created in.
- If you are working locally, you need NodeJS, v22.12.0 or later (alternatively -- v20.19.0 or later).
- A modern web browser such as Chrome, Safari, or Firefox.
This content applies to the following Redocly products and their corresponding package names:
- Reef =
@redocly/reef - Revel =
@redocly/revel - Redoc =
@redocly/redoc - Redoc + Reef =
@redocly/redoc-reef - Redoc + Revel =
@redocly/redoc-revel - Revel + Reef =
@redocly/revel-reef
Replace package names in sample commands and JSON dependencies with the Redocly product you are using.
Check version
Before you can decide if you want to update your version, you need to know what version your project is currently using. You can ascertain the version your project is using with the developer tools in your browser.
To verify the version your project is using:
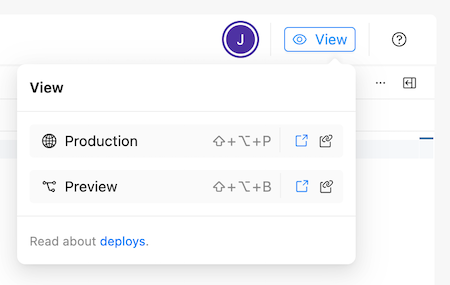
From the Reunite editor, open the preview or production build of your project in your browser, using the View drop-down in the top left corner of the page.

Right-click anywhere on a page and select Inspect or Inspect Element.
In the developer tools pane, select Console.
You should see the version displayed as in the following screenshot:

After you have determined what version your project is running, you can find the latest version to help you decide if you want to upgrade.
Find the latest version
If you know what version you are running, but you are not sure if it is the latest version, you can see a list of all available versions or get only the latest version either from the changelog or by using npm commands.
To find the latest Realm version, use the following npm command:
npm view @redocly/realm version
To find a list of all available Realm versions, use the following npm command:
npm view @redocly/realm versions
If you are using a different product than Realm, such as Reef, Revel, Redoc, or a combination, substitute that product name in the command. For example, to find the latest Reef version, use the following command: npm view @redocly/reef See a list of product names and their corresponding packages in the Before you begin section.
Run a specific version
You may need to run a specific version, instead of the latest version. You can control what version your project runs, using a package.json file.
Run a specific version locally
If you want to run a specific version, you need to add a package.json file to your project if you don't already have one. You also need to install @redocly/cli globally and your Redocly product to your project directory.
To run a specific version working locally:
Add the following
package.jsonfile to the root of your project, replacingrealmwith the Redocly product you are using and the*for the version you want to run:package.json{ "name": "demo", "version": "1.0.0", "description": "", "author": "", "license": "UNLICENSED", "dependencies": { "@redocly/realm": "*" } }Install your product to your project directory using the following command:
npm iInstall
@redocly/cliglobally using the following command:npm i @redocly/cli -gRun your project using the following command:
redocly previewUsing your developer tools, verify the version in the console as described in Check version.
Run a specific version in Reunite
If you are working in the Reunite editor, your project by default uses the most recent version, and automatically updates whenever new versions are released and you trigger a new build. However, if you would like to use a specific version and not update automatically, you can add a package.json file to your project with the version listed.
To run a specific version in Reunite:
Create a new development branch.
Create a branch steps
Before you make any changes to your project, create a new branch. This new branch is a place where you can make changes without affecting the published site until you are ready. After you have iterated on your changes based on reviews by your team and the updates have been approved, you can merge your changes into the published site.
To create a new branch:
From the Reunite editor, click the name of the current branch at the top of the page.

Enter the name for your new branch, for example
new-dev-branch, and select Create branch.Reunite automatically replaces spaces with hyphens
-because spaces are not allowed in branch names.
On the new development branch, add a new file named
package.jsonby clicking the + icon and selecting New file.Paste the following configuration into the
package.jsonfile, replacingrealmwith the Redocly product you are using and the*for the version you want to run::package.json{ "name": "demo", "version": "1.0.0", "description": "", "author": "", "license": "UNLICENSED", "dependencies": { "@redocly/realm": "*" } }Commit your update.
Create update steps
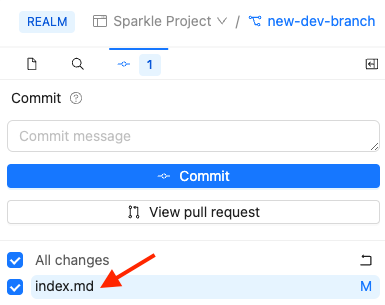
Click the Commit button, or the commit icon.

Review the diff by clicking on the modified file.

When you are finished reviewing the diff, you can close the tab on the (changes) file.
(Optional) you can deselect the files you want to exclude from the commit.
Enter a commit message describing your updates. For example, "Update index.md"
Click Commit.
After the preview build has completed, open it using the View drop-down in the top right corner of the page.

To run this version in your production build, open a pull request, then review and merge it with the new
package.jsonfile.