Create page in React
Markdown is the primary format for creating content in Redocly projects, but React pages offer additional flexibility. Use React pages for dynamic content, complex layouts, or advanced interactivity.
This guide shows you how to create a React page in your Redocly project (Realm or Revel).
Before you begin
Make sure you have the following before you begin:
- A Revel or Realm project running locally
- Basic knowledge of React
Create a new React page
Render React code as an independent page by adding the .page.tsx suffix on the filename. Similar to Markdown pages, React pages use file-based routing and can be located anywhere in a project.
See how React pages are used in a project
It's common for projects to have both Markdown and React pages, as in the following example project structure:
your-awesome-project/
├──@theme/
├──static/
├──guides/
│   ├──example-guide.md
│   └──pricing.page.tsx
├──about/
│   ├──index.page.tsx
│   └──ContactForm.tsx
├──index.md
├──redocly.yaml
└──...
In this example, the ContactForm.tsx file defines a component imported by other pages. It doesn't render as a page because the file doesn't have a .page.tsx suffix.
To create a React page, add a new file to the root of your project named example.page.tsx.
Add content to React page
Add content to the new page by creating a React component. View the page in your local preview.
The following example content is for example.page.tsx, which can be viewed at <your-local-host>/example:
import React from 'react';
import styled from 'styled-components';

export default function () {
  return (
    <Wrapper>
      <h1>Example React page</h1>
      <p>Hello world!</p>
    </Wrapper>
  );
}

const Wrapper = styled.div`
  padding: 40px;
`;
Your IDE may show a Cannot find module... linting error for react and styled-components. You have two options:
- Ignore them; the modules resolve when
npx @redocly/cli previewruns. - Remove the errors by installing a local version of your Redocly product --
@redocly/realmor@redocly/revel.
Set front matter for a React page
Set the React page's front matter by exporting a frontmatter object.
Front matter is used to set page metadata or configure page behavior, as in the following list of examples:
Hide navbar and footer elements:
export const frontmatter = {
  navbar: {
    hide: true,
  },
  footer: {
    hide: true,
  }
};
Set page permissions using RBAC:
export const frontmatter = {
  rbac: {
    Admin: 'admin',
    Employee: 'read',
  },
};
Add SEO titles and descriptions:
export const frontmatter = {
  seo: {
    title: 'Some Amazing Guide',
    description: 'Wow this guide is amazing!',
  },
};
Block indexing by search engines:
export const frontmatter = {
  seo: {
    meta: [
      {
        name: "robots",
        content: "noindex"
      }
    ]
  },
};
Add React page to navigation
Add the page to your site's navigation elements, such as the sidebar, navbar, or footer, using the page's relative filepath.
The following example shows a sidebar configuration that includes React pages:
- separator: Demo sidebar
- page: about/index.page.tsx
  label: About us
- group: Guides
    items:
      - page: guides/pricing.page.tsx
      - page: guides/example-guide.md
If needed, you can use frontmatter to set the page's sidebar without listing it in the sidebars configuration file.
Landing page examples
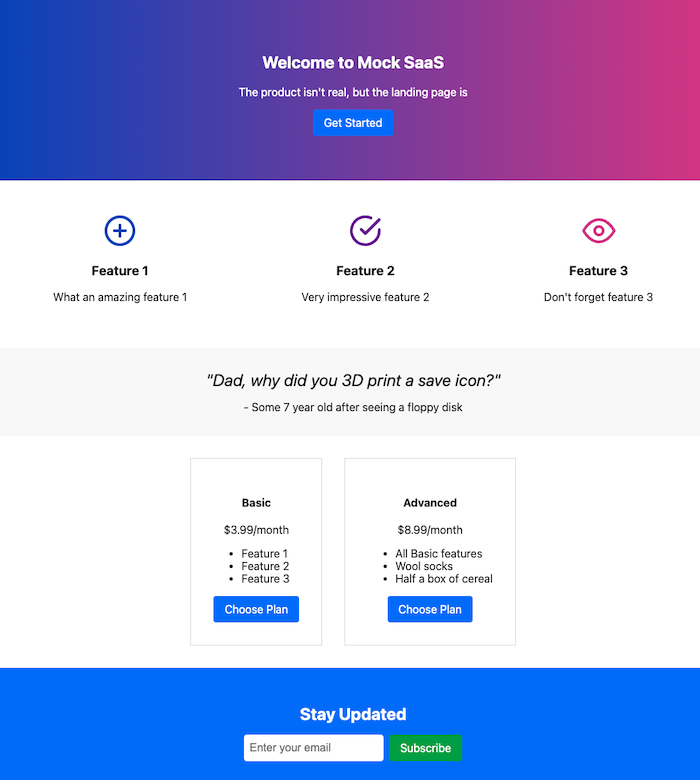
Redocly provides a gallery of example landing pages built with React. These examples can help you get started creating your own custom React pages.
The following example pages are available in the gallery:
| Screenshot | Description |
|---|---|
| This example shows a sleek, modern landing page for a SaaS product. Tools: React, styled-components |
| This example demonstrates a landing page built for training and onboarding purposes. Tools: React, styled-components |
Resources
- Review examples in the React landing page gallery.
- React pages can be used as custom page templates for Markdown pages.
- Change the look and feel of React pages using CSS to create custom styling.
- Implement page-level access control using page permissions.

