Eject components in Reunite
Ejecting a component creates a copy of its source code in your project, where you can modify the component's styles, structure, or behavior. This guide provides instructions on how to eject and override components in the Reunite editor.
Identify a component to eject
Before you can eject a component, you need to know what component to eject. One way to identify a component to eject, is by inspecting the UI element using the browser developer tools. Otherwise, to see all components that can be ejected, you can open Theme components section in the Editor tab. You can also use search or expand each folder to see which components could be ejected.
Eject a component
Once you have determined you need to eject a component and you have determined which component to eject, you can eject components in the Reunite editor.
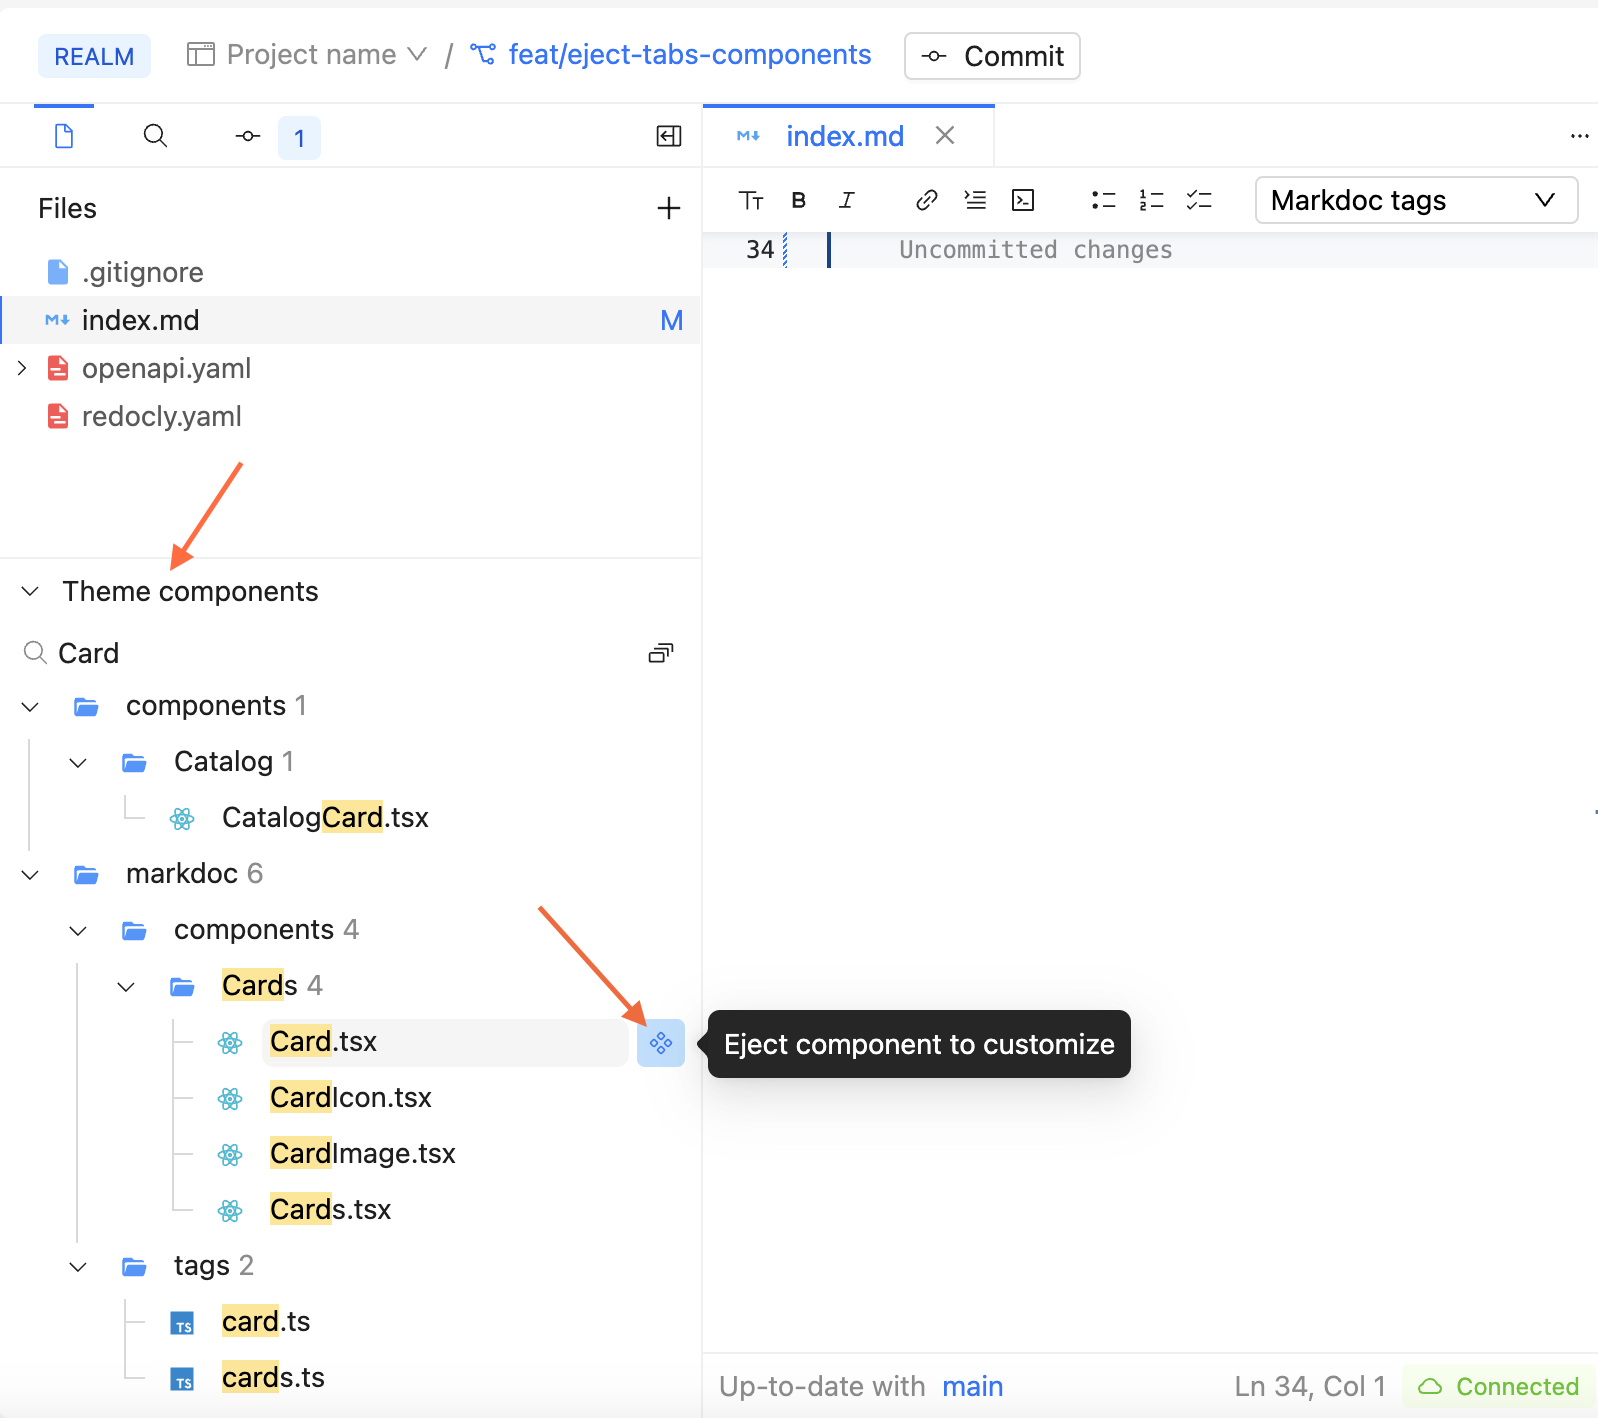
To eject a component in the Reunite editor:
- Select Editor on the left side navigation.
- Click Theme components in the Files section.
- Find the component you would like to eject and click the eject icon.
The ejected component is added to the @theme folder, where you can modify it.
Delete ejected component
If you change your mind and no longer want an ejected component in your project, you can delete the component and it is replaced with the default component.
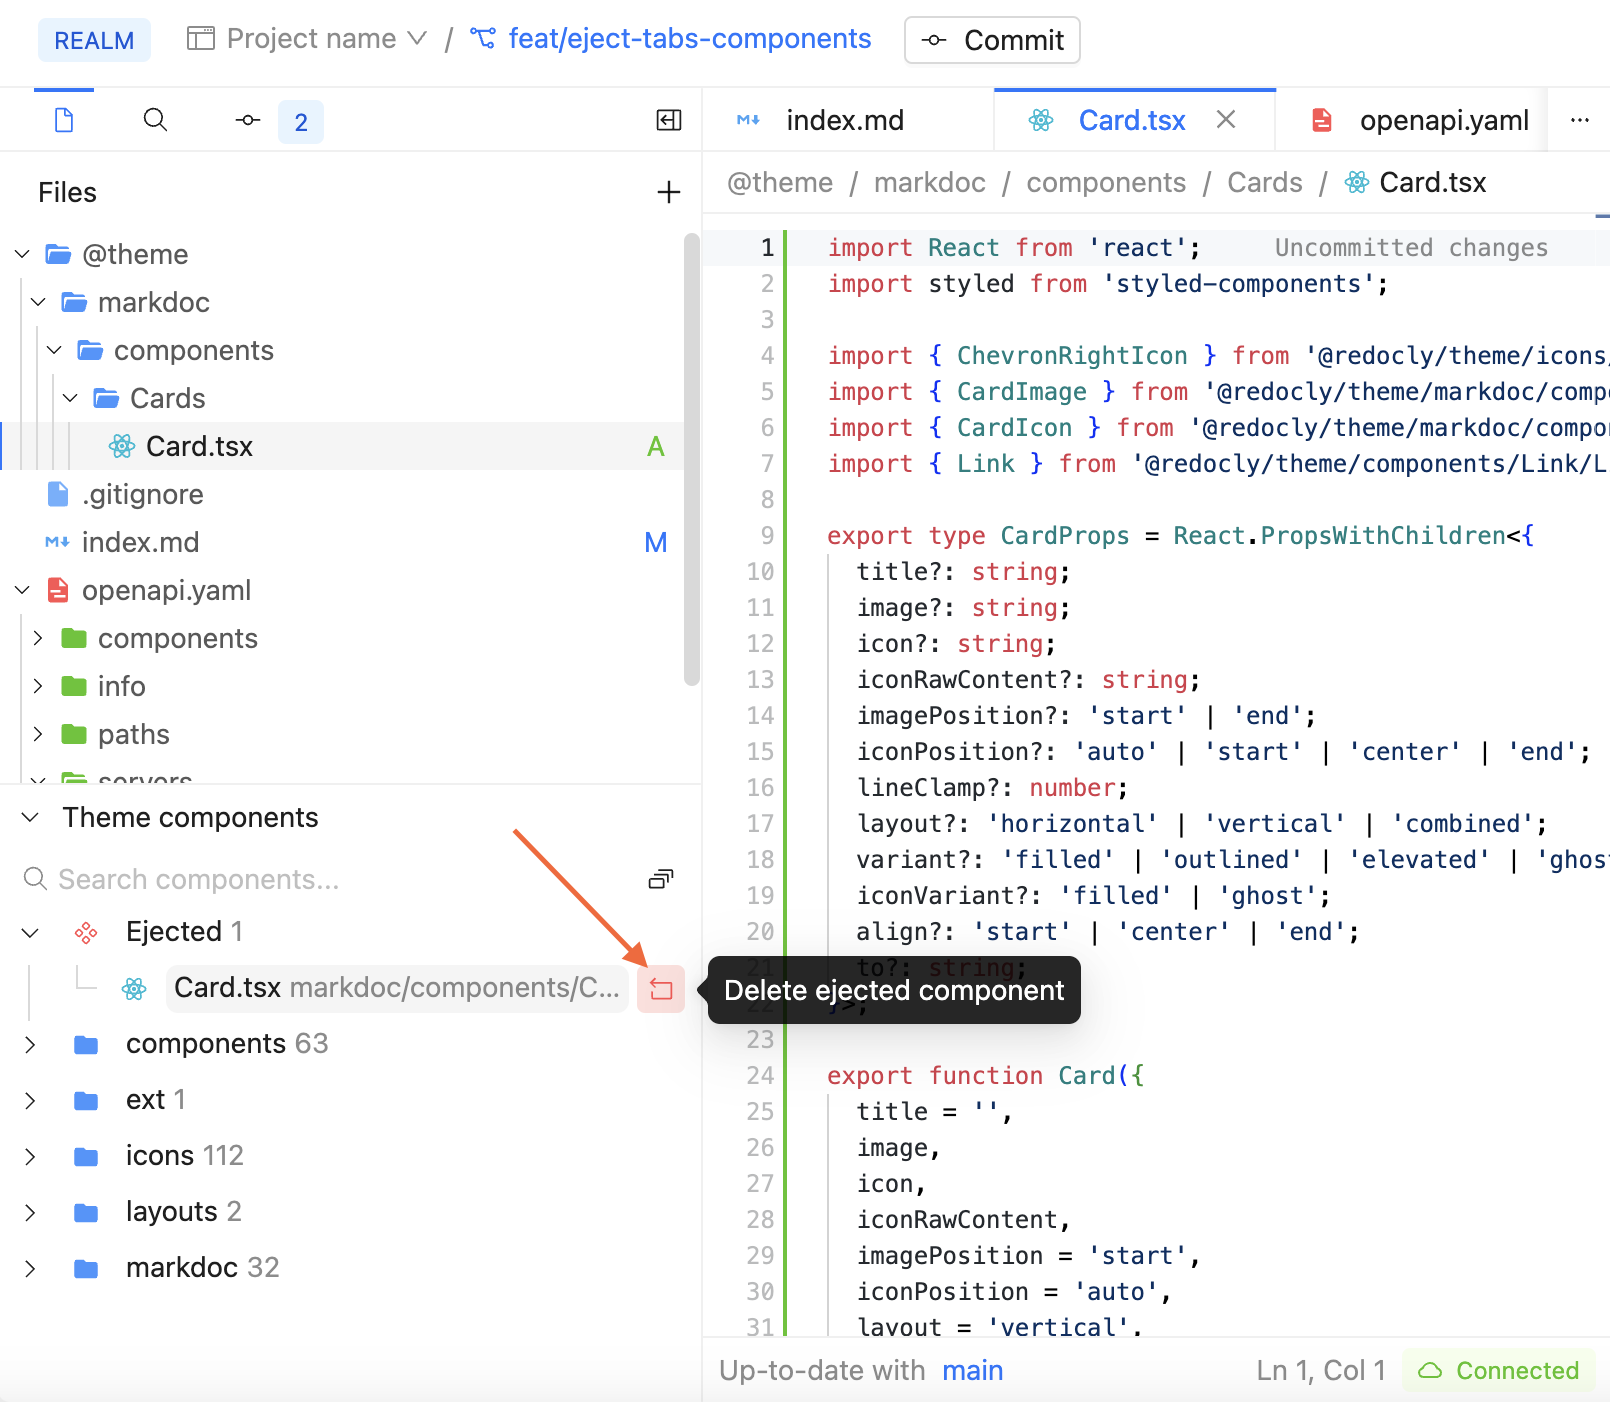
To revert the ejected component and use the default one, complete the following steps:
- Select Editor on the left side navigation.
- Click Theme components in the Files section.
- Click the Ejected folder.
- Click the Delete ejected component icon.
- Click Delete in the confirmation dialog.
The component is removed from the @theme folder and the default component is used instead. You can also delete components from @theme folder manually.
Related how-tos
- Learn more about when you should Eject components.
- Follow steps to Eject components using the CLI.
Resources
- Learn how to Eject components in practice.