The toggle tag makes walkthrough content interactive, allowing users to toggle features or configurations to explore different scenarios. It wraps content and steps inside the walkthrough and adds a toggle to the UI used to display or hide the content within.
| Attribute | Type | Description |
|---|---|---|
| id | string | REQUIRED. Unique identifier for the toggle. Must be unique among all toggles, inputs, and filters. Used for controlling the visibility of child elements. |
| label | string | REQUIRED. The header displayed for the toggle. |
| when | Conditions object | Conditions for when the toggle is visible. |
| unless | Conditions object | Conditions for when the toggle is not be visible. |
Provide conditions for when to display certain UI elements such as toggles or inputs. You can also add conditions for when to display content such as steps or code sample files when a filter is selected.
| Attribute | Type | Description |
|---|---|---|
| {toggle id} | boolean | True if toggle is enabled. |
| {filter id} | string | [string] | A single or list of filter ids. |
| {input id} | string | [string] | A single or list of input ids. |
The toggle content is hidden when the toggle is collapsed. Use the description slot to define content that renders below the toggle regardless of the toggle state, such as more information about a feature.
{% toggle id="toggle-id" label="Toggle example" %}
  {% slot "description" %}
    Explanation and context about the toggle.
  {% /slot %}

  Optional internal content or nested steps.
{% /toggle %}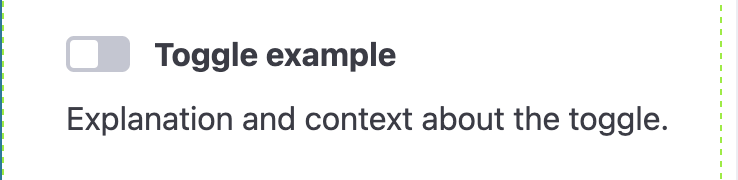
Chunk annotations ("chunks") are single-line comments you add to code example files to control the highlighting behavior of a code-walkthrough. Each chunk has an opening and closing annotation, wrapping sections of code.
The exact comment syntax varies between languages, but the chunk syntax remains the same, as in the following examples:
<head>
  <!-- @chunk {"steps": ["add-script"]} -->
  <script src="script.js"></script>
  <!-- @chunk-end -->
</head>Each chunk requires either a step id, or a when or unless condition with a filter, toggle or input id. The code that is wrapped within a set of chunk annotations is highlighted when the corresponding content in the step tags is selected or when the input or toggle tag condition is met in a code walkthrough.
If you have the same step id in two chunks in separate files, selecting the content in the step tags for the step id, highlights the first file from the list.
| Attribute | Type | Description |
|---|---|---|
| steps | array | A list of step ids that activate the chunk's highlighting. |
| when | Conditions object | Conditions for when the code snippet wrapped in a chunk can be revealed with a filter or toggle. |
| unless | Conditions object | Conditions for when the code snippet wrapped in a chunk can be hidden with a filter or toggle. |
You can nest chunks inside each other to highlight a larger section along with smaller subsections inside them.
<!-- @chunk {"steps": ["hello-world-html", "create-html-file"]} -->
<!DOCTYPE html>
<html lang="en">
  <!-- @chunk {"steps": ["html-head"]} -->
  <head>
    <meta charset="UTF-8">
    <title>Hello World Page</title>
    <!-- @chunk {"steps": ["link-stylesheet"]} -->
    <link rel="stylesheet" href="styles.css">
    <!-- @chunk-end -->
  </head>
  <!-- @chunk-end -->
  <body>
    <p>Hello world.</p>
  </body>
</html>
<!-- @chunk-end -->
Using indentation can help organize your chunks and ensure they're all closed.
Similar to the step tag, you can define when and unless conditions that control the visibility of code snippets wrapped in chunks in the code panel. Conditions are evaluated against the code walkthrough filters, toggles, and inputs.
The following example includes content that is revealed when "npm" is selected in a "client" filter and different content is displayed when "pip" is selected in the same filter:
{% toggle id="testimonial" label="Add testimonials" when={ "filetype": "React" } %}
{% slot "description" %}
Add testimonials to your landing page.
{% /slot %}

{% step id="step-2b" heading="Add a testimonial" %}
Add a testimonial section to your page using the highlighted code.
{% /step %}
{% /toggle %}{% code-walkthrough ... %}
{% toggle id="error-logs" label="Add logging" %}
{% slot "description" %}
This is a description in a Markdoc slot!
Enable logs to display errors and debug potential bugs and issues.
{% /slot %}
{% step id="error-logs" heading="Add Error Logs" %}
Add exception and error logs
{% /step %}
{% /toggle %}
{% /code-walkthrough %}- Learn how to use Markdoc to create interactive code guides in Create code walkthrough how-to documentation.
- Control the highlighting behavior of code examples with chunk annotations.