The API registry serves as a single source of truth for your APIs, and allows you to reuse API definitions across your API versions, docs, and Developer portals.
You can also use the API registry to store other types of files alongside your API definitions.
The API registry supports the following file formats:
- Markdown (md, mdx)
- Web formats (js, css, woff, woff2, html, js.map, xml, graphql, gql)
- YAML (yaml and yml) and JSON (json) files
- Image files (png, jpeg, jpg, gif, webp, svg, ico)
- Common document formats (pdf, txt, xlsx, doc, docx)
- Other formats (mp4, zip, gz, webmanifest, ttf, otf, opvn)
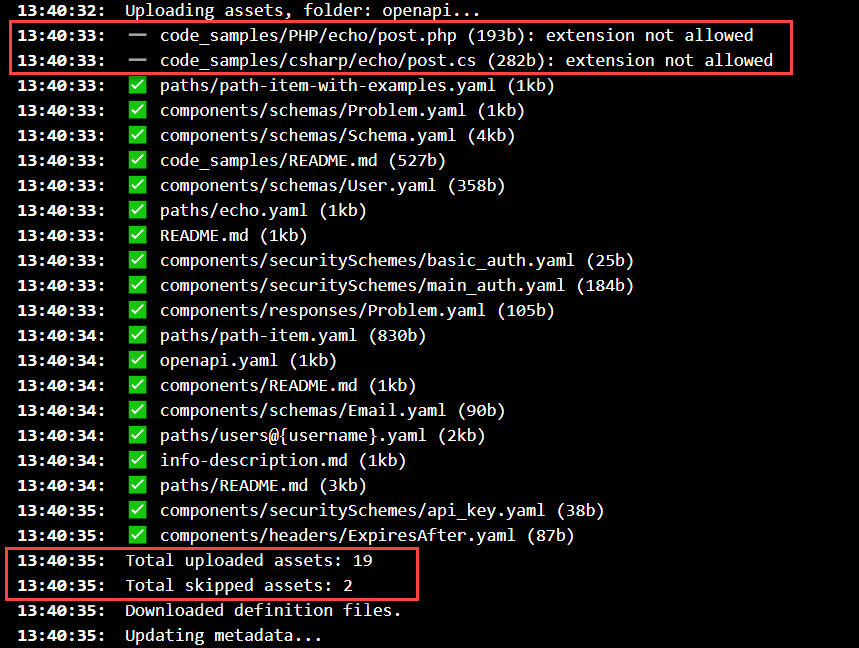
The build process automatically blocks unsupported file types. These files are not added by the API registry build process, and an unsuccessful message is displayed in the build logs.
Before you add files to the registry, they must already exist in your API version source.
File upload is supported for version control and CICD sources. The file upload source partially supports uploading other files in addition to the API definition.
You can add files up to a size limit of 100 MB combined, or a maximum file size of 20 MB per file.
- If the file size exceeds 20 MB or has an incorrect extension, the file is not added and an error message is displayed in the build log.
- If the combined size exceeds 100 MB, the add process fails and an error message is displayed in the build log.
Log in to your organization in Workflows and select API registry.
On the API registry page, either:
- select Add API to add a new API to the registry
or
- select an existing API version, and access the Settings > Source page.
If you have decided to add a new API and upload files to the registry, follow the API registry quickstart guide for the exact steps. That guide uses GitHub as the example source. Available options may differ depending on the source type.
When you get to the Source settings dialog, make sure to select Include other files from this repo.
In the Select the folder dropdown, choose the folder where your files are stored. Folder upload is recursive, so if there are any subfolders in the selected folder, they are added automatically.
Save your changes to finish adding the API and the files to the registry. Check the file upload status in the build information to make sure all your files are uploaded successfully.
If you have previously created an API version without files in the registry, you can add files to it by modifying its source settings. We'll refer to GitHub as the example source. Available options may differ depending on the source type.
On the Settings > Source page of your API version, select the Edit source button.
In the dialog that opens, select Include other files from this repo.
In the Select the folder dropdown, choose the the folder where your files are stored. Folder upload is recursive, so if there are any subfolders in the selected folder, they are added automatically.
Make any other changes if necessary, and select Save to finish adding files to the registry. This triggers a new build. Check the file upload status in the build information to make sure all your files are uploaded successfully.
To view the build information, select the build name in the Logs section on the API version Overview page.
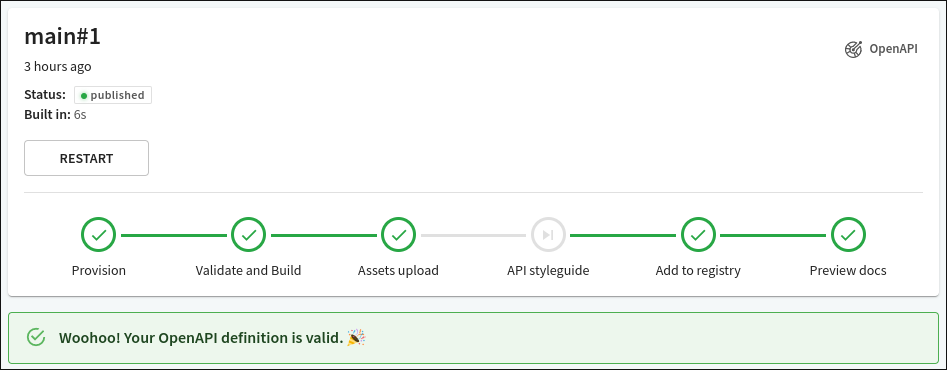
The build details page displays the build summary at the top. Select the Show terminal button to view the detailed build output.
Build summary
A step-by-step overview of the stages in the build process, including the validation status of your OpenAPI definition(s). The Assets upload step indicates the file upload status.

API version results
Detailed build output, including the status of the files (accepted and rejected file types).
