The developer portal beta is approaching end of life.
Use Realm and Reunite instead. Read the migration guide.
Depending on your plan and role, people with the Owner role for an organization (or Admin role on a project) can control who has what access to Portals.
- Log in to your organization in Workflows, and select Portals.
- Select the Portal for which you want to set up access control. The Overview page is displayed.
- Select the Settings tab to view the Portal settings.
- On the Settings page, from the left, select Manage access.
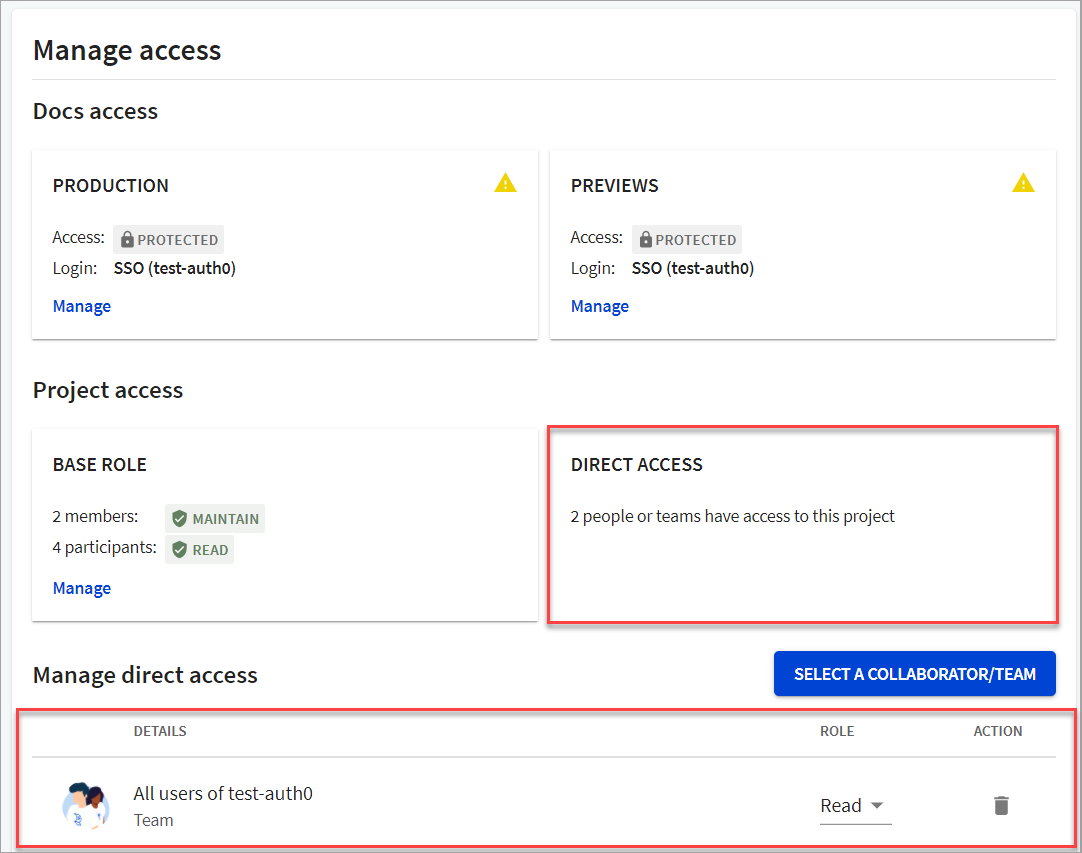
The Manage Access page displays the following information:
- Docs access: Displays the current access assigned for Production and Preview docs. To manage docs access, select Manage, which allows you to set access controls on preview and production builds.
- Base role: You can set base permissions that apply to all members of an organization when accessing any of the organization's projects. By default, members of an organization have
Maintainpermissions to the organization's projects. To change the base role assigned to members, select Manage. - Direct access: Displays who outside your organization has access to your projects. You can invite a member (not currently part of your organization) to collaborate on your projects.
- Manage direct access: You can use this section to select, remove or edit collaborators or teams for the selected project.
Pro and Enterprise customers can use SSO with either an OIDC or SAML2 connected identity provider. Using SSO enables anyone with an account on their identity provider to read the docs. You can control access to both the production and the preview environments separately.
Before you can set access control for your docs, you need to set up your identity providers. For more information on how to do this, refer to the Configuring multiple identity providers (IdPs) topic.
To set docs access (for either Production or Previews),
- Select Manage (for either Production or Previews). The Manage docs access dialog displays.
- Select Protected and tick SSO login.
- From the identity provider dropdown, select the identity provider you have set up to protect your Production docs.
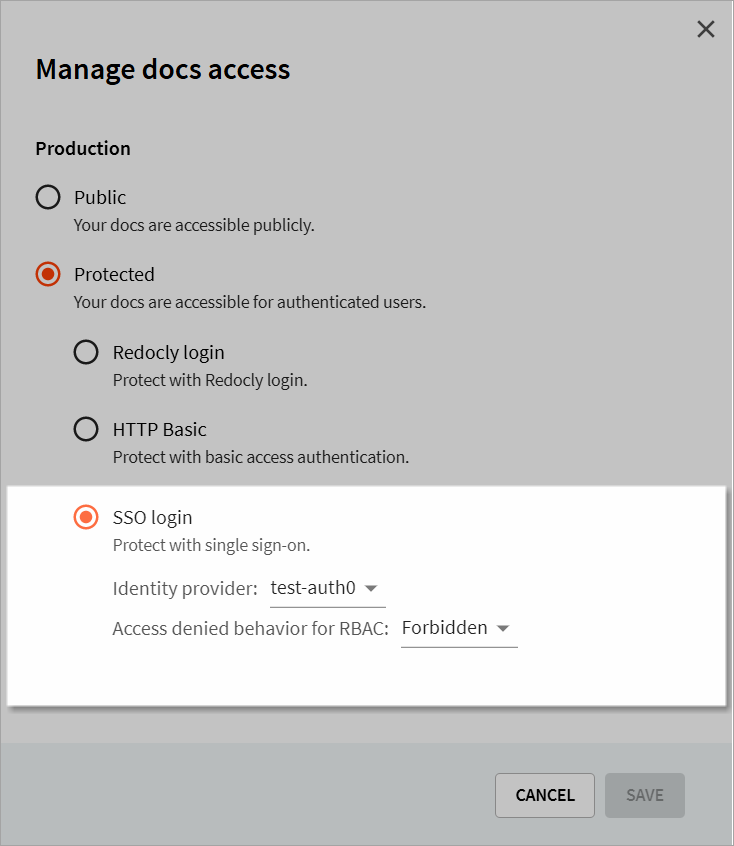
- Select Save to save your settings.
Using the project access section, you can manage base role or direct access to Reference projects.
To set up the base role, under the Base role, select Manage. The Settings > Access control page displays.
For more information, refer to the Access control topic.
Instead of using the Redocly login or the SSO login, you can use HTTP Basic auth to set up basic username and passwords to restrict access to the docs. This is only available on docs projects (not snapshots). It is recommended to prevent spiders, or when you need to share a preview with someone outside of your organization.
Basic auth is not secure, so we recommend choosing the SSO login for the most secure access control.
People with the Owner role for an organization (or Admin role on a project) can add outside collaborators to a project, unless an organization Owner has restricted the ability to invite collaborators. For more information, refer to the Roles and permissions topic.
When you select a collaborator or a team, they get direct access to the selected project (either Reference or Portals).
When you select a team for collaboration, all users that are part of the team automatically become collaborators on the selected project unless they have a lower role such as Read or Triage. A person's base role overrides any team roles.
- Under the Manage access section, select Select a Collaborator/Team.
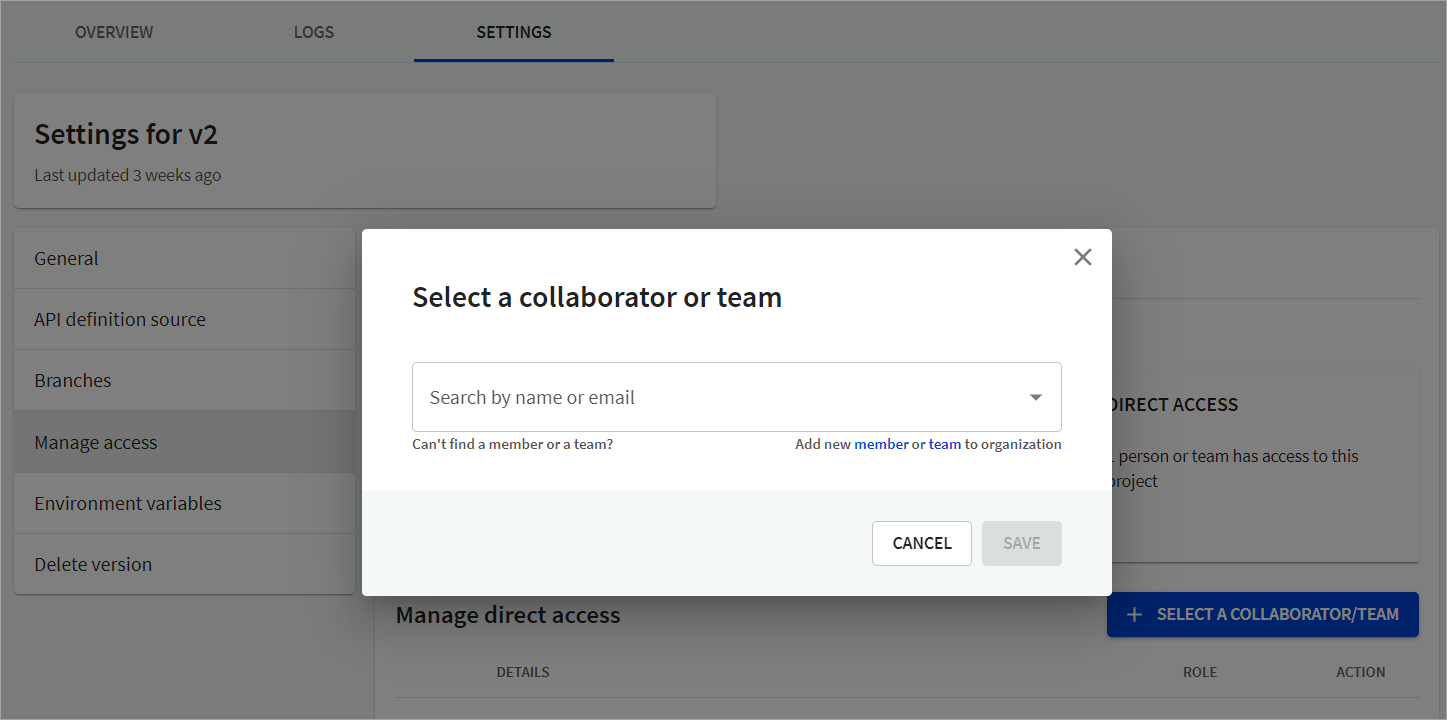
- From the dropdown, search by name or email to select a collaborator/team.
If a member or team does not display in the dropdown, you can add a new member or team from this dialog. You are redirected to the Users or Teams page as selected.
- Select the project-level role you want to assign to the collaborator/team, and select Save.
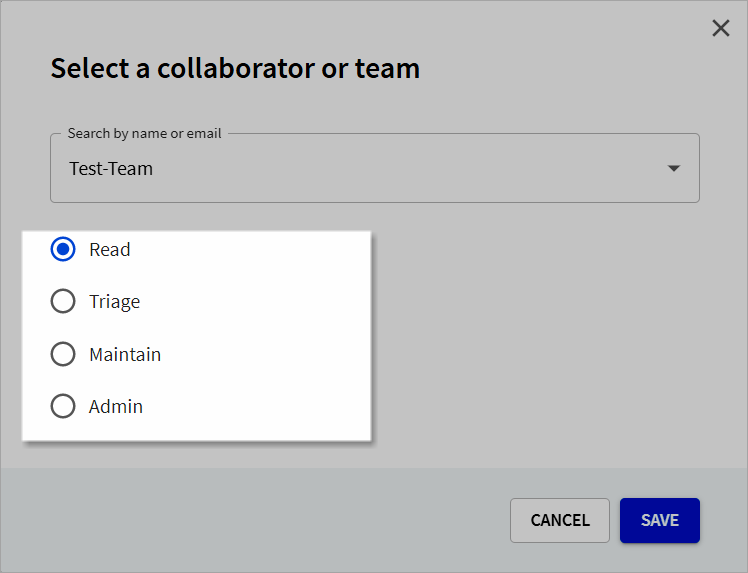
For more information, refer to our Project-level roles topic.
The member details are now displayed in the Manage access section.
The Direct access tile is updated to display the number of people who have direct access to the selected project.
If you want to add a collaborator who is not currently a part of your organization, you need to add/invite a new member to your organization. Once they have accepted your invitation and logged in using the invitation link, you can add them as a collaborator, and assign them a relevant project-level role.
To invite a new member to your organization, see the Managing access to Workflows topic.
People with the Owner role for an organization (or Admin role on a project) can update a collaborator's role on a project in the Manage access section.
Under the Manage direct access section, select the collaborator whose role you want to update, and under Role, select the role you want to assign to the collaborator.
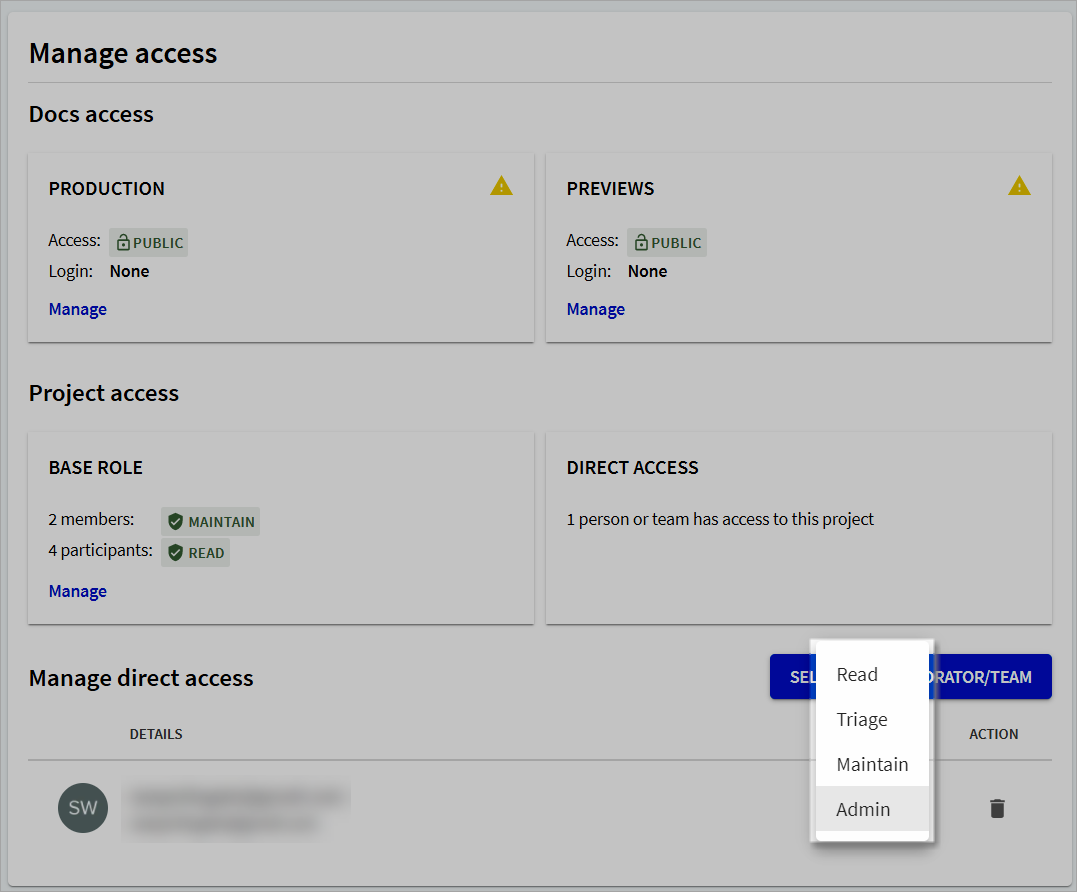
The collaborator role and permissions are immediately updated for the selected project.
People with the Owner role for an organization (or Admin role on a project) can delete collaborators to a project in the Manage access section.
- Under the Manage direct access section, select the collaborator you want to delete, and select the Delete icon. A confirmation dialog displays.
- In the Remove collaborator dialog, select Delete.
- The collaborator details are removed from the Manage access section.
- The Direct access tile is updated to display the number of people who have direct access to the version project.