Set up and configure the Apigee proxy
This topic provides instructions on how to set up and configure the Apigee proxy. Redocly's Apigee UI components require an Apigee proxy to be able to enable developers to manage apps and keys.
This topic is for organization owners or administrators responsible for managing Apigee.
This proxy can:
- authenticate users (verify IDP token),
- create developers in Apigee,
- allow access to routes needed only for managing developer applications and keys for a specific developer,
- forbid all other routes, and
- be extended with any custom case-specific logic (such as logging, security, notifications, or more).
Prerequisites
Connect an OpenID Connect (OIDC) identity provider.
For Apigee X you need to create a special service account in Google Cloud Console.
- Use the following tutorial: https://cloud.google.com/apigee/docs/hybrid/v1.2/sa-about
- Use Apigee Organization Admin permission and save a JSON key.
For Apigee Edge you need to create a service user account.
Task 1: Upload proxy bundle to Apigee
Download the Apigee X or Apigee Edge proxy bundle zip file from Settings > API gateways.
To upload the proxy bundle to your Apigee account:
- Log in to Apigee (Edge or X), and navigate to Develop > API Proxies.
- On the Proxies page, select +Proxy to display the Create proxy page.

- From the list of templates, select Upload proxy bundle.
 The Upload proxy bundle page displays.
 - Drag and drop or click to upload the proxy bundle for your Apigee deployment type. Make sure to first download the bundle from the Redocly app on the "Settings" -> "API Gateways" page. The name field is automatically populated from the proxy bundle zip file.

- Select Next. The selected proxy bundle is uploaded and a Summary page displays.
- Select Create to upload the proxy bundle. A confirmation message displays and your proxy is uploaded successfully.
Task 2a): Set up key value map information for Apigee Edge
After uploading the proxy bundle, create key value maps and set up the system user credentials.
To create key value maps and set up user credentials:
- From Apigee Edge, navigate to Admin > Environments > Key Value Maps. The Key value maps page displays.
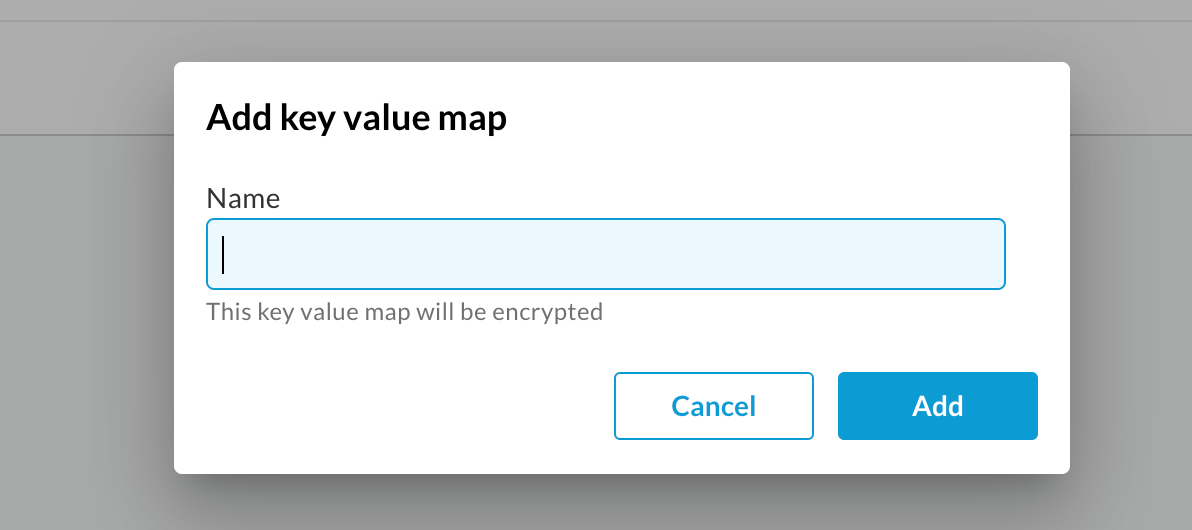
- Select +Key value map to display the Add key value map dialog.

- Enter a name for the key value map, select the Encrypted check-box.

- Select Add. A new key value map is created and displays on the key value maps list.
- Select to open the newly created key value map, and select + to add a key value pair.

- For the selected key value map, add these key value pairs:
- username: Enter the email address you use for accessing Apigee Edge.
- password: Enter a password for the pair.
Task 2b): Set up key value map information for Apigee X
After uploading the proxy bundle, create key value maps and set up the service user credentials.
To create key value maps and set up user credentials:
- From Apigee X, navigate to Admin > Environments > Key Value Maps. The Key value maps page displays.
- Select +Key value map to display the Add key value map dialog.

- Enter a name for the key value map.
- Select Add. A new key value map is created and displays on the key value maps list.
- Set the contents of the service account JSON file (see prerequisites) as the
serviceAccountCredentialsFileparameter of the KVM.
You cannot add or retrieve data to the KVM in the Apigee X UI. You must use the KeyValueMapOperations policy to add or retrieve data to KVMs.
You can use https://github.com/apigee/devrel/tree/main/references/kvm-admin-api to set the values to the KVM. Follow these steps to set the value using Redocly's built-in policy.
5.1. Navigate to Develop > API Proxies and select to open the API proxy you created in Task 1. 5.2. Select Develop tab, and:
Under Policies, select [example] Set Service Account Creds
Follow the instructions from the comment in the policy

Task 3: Map authentication credentials and deploy proxy
Once you have set up the key value map information, you can map the authentication credentials and deploy the proxy to the appropriate environment.
- Navigate to Develop > API Proxies and select to open the API proxy you created in Task 1.
- Select Develop tab, and:
- Under Policies, select Get Auth Creds for Apigee Edge or Get Service Account Creds
- Under Property Inspector, for mapIdentifier, enter
system-user-creds(This is the key value map you created in Task 2)
- Select Save to save your changes.
- From the Deployment dropdown, select the environment you want to deploy the proxy to. A confirmation message displays.

- Select Deploy. The proxy is now deployed to the selected environment and a deployment URL is generated for the proxy.
- Select Overview tab to view the deployment URL.

You need the deployment URL (proxy URL) for enabling your Redocly Portal Apigee UI components.
Task 4: Configure Apigee proxy for your identity provider
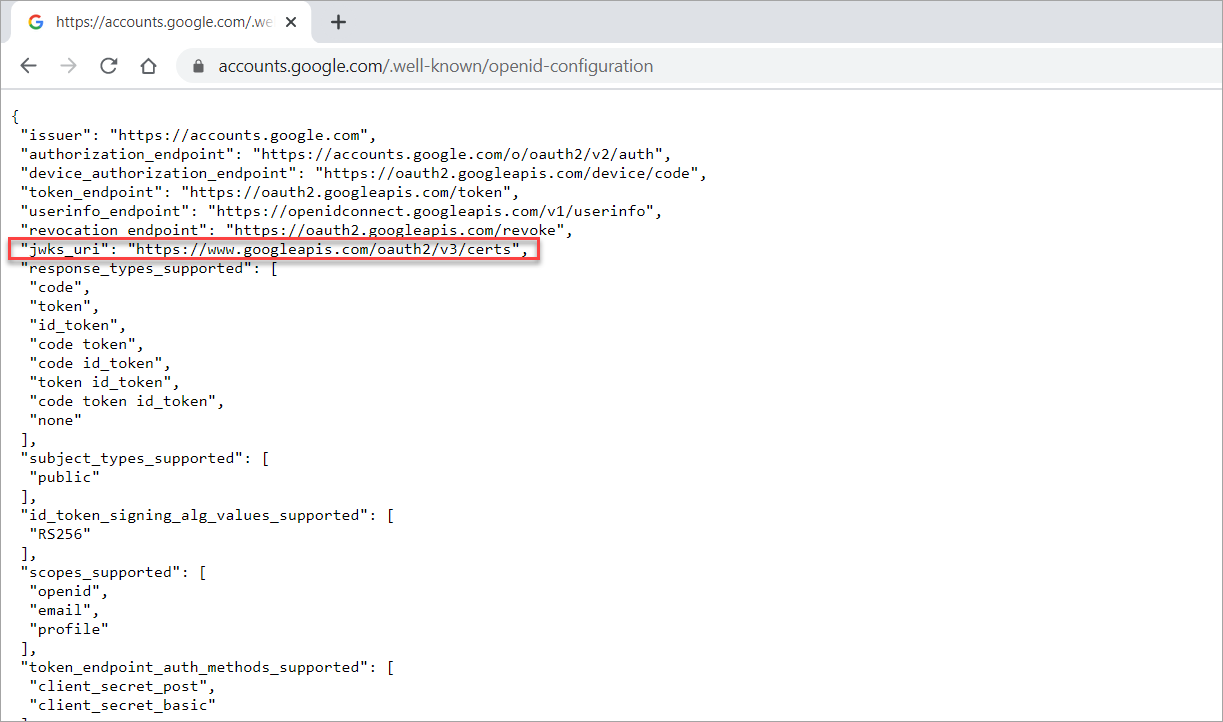
In this step, organization owners add the JWKS URL from their OIDC provider into the Apigee proxy.
- In a browser, enter the Config URL. The browser displays a response in JSON format. Tip: You can find the Config URL in your OIDC setting.

- From the response body, copy the
jwks_URLvalue.
- Navigate to Develop > API Proxies and select to open the API proxy you created in Task 1 and select the Develop tab.
- Under Policies, select Verify JWT. The Verify JWT code displays.
- Paste the
jwks_URLinto the code forJWKS uri.
- Select Save to save your changes.
Next steps
Continue to enable the UI components within your developer portal so that your portal users can manage apps and keys.